

+86 177 5198 6706
222, Block B, Diamond International, Guozhuang Road, Xuzhou, Jiangsu, China
01/Overview
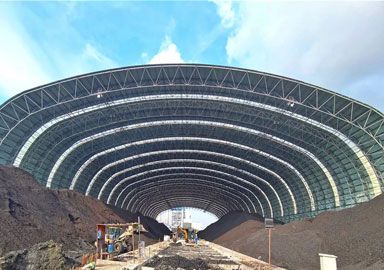
The Ouhai Olympic Sports Center project is located south of the Asian Games Park on Shanghui Road, Louqiao Street, Ouhai District, Wenzhou City, Zhejiang Province. The building area is 182,000 square meters. The Ouhai Olympic Sports Center Gymnasium has a curved shape and a circular plan projection. The roof is a cable-stayed grid shell structure, mainly composed of an upper grid shell, a lower cable-stayed cross-cable system, and vertical struts. The upper grid shell is a curved welded box-shaped steel structure. The main body of the roof is supported by 24 outer ring beams, and the maximum span of the roof is approximately 100.6 meters. The upper chord grid shell is cylindrical with a rise of 9.425 meters.
02/Cable Structure System
The gymnasium roof structure is a cable-stayed grid shell structure. The top elevation of the roof structure is 29 meters, and the absolute height from the ground is 35 meters. The lower cross-cable system projects in a petal shape. The inner petal is composed of two intersecting triangular cable systems with cables measuring φ40mm; the middle petal is composed of two intersecting triangular cable systems with cables measuring φ75mm; and the outer petal is composed of three intersecting quadrilaterals with cables measuring φ110mm. Each layer of cable system is supported by vertical struts, thus elevating the entire reticulated shell.
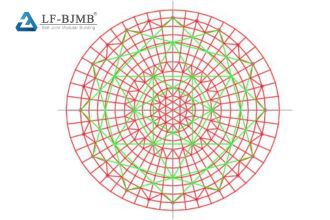
Figure 2 Roof Structure Plan
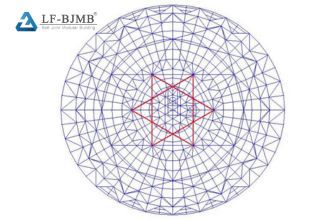
Figure 3 Cable Numbering Diagram
03/Cable Structure Construction
1) Overall Installation Steps
Transport cables to site → Unwind cables → Install struts and upper cable clamps → Measure the installation deviation of the lower node of the strut → Adjust the cable length according to the markings on the surface of the ring cable skin, considering the installation deviation of the lower node of the strut and the cable length error, then hoist the inner ring cable and install the cable clamp → Hoist the middle ring cable and install the cable clamp → Hoist the outer ring cable and install the cable clamp → Tension the inner ring cable to the first stage → Tension the middle ring cable to the first stage → Tension the outer ring cable to the first stage → Tension the outer ring cable to the second stage → Tension the middle ring cable to the second stage → Tension the inner ring cable to the second stage (100% cable force value) → Accept the final cable force and displacement → Fine-tune the cable force → Construction completed.
2) Installation Process Diagram
The cable installation for this project consists of two main stages: cable installation and cable tensioning. The installation principle requires that the cable numbering and vertical positioning match the construction drawings. The specific construction sequence is as follows:
Step 1: Install the inner ring cables (6 cables);
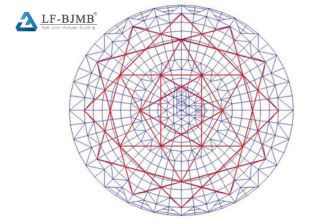
Figure 4: Schematic diagram of Step 1 installation
Step 2: Install the middle ring cables (6 cables);
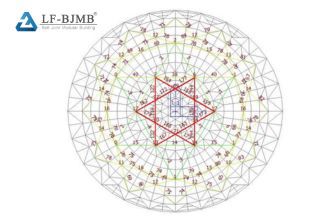
Figure 5: Schematic diagram of Step 2 installation
Step 3: Install the outer ring cables (12 cables).
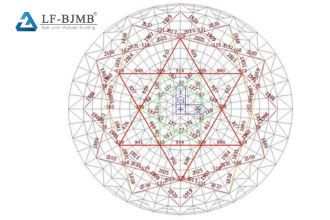
Figure 6: Schematic diagram of Step 3 installation
3) Tensioning Sequence Diagram
The tensioning control principle is that the cable force and roof configuration must meet the design requirements. After the cable net is assembled, the cables are tensioned from the inside out to 70% of the initial tension, and then tensioned from the outside in to 100% of the initial tension to achieve the design cable force.
Step 1: Tensioning the first stage of the inner ring cable;
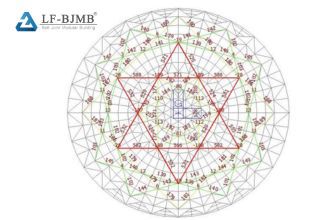
Figure 7: Schematic diagram of tensioning the first stage
Step 2: Tensioning the first stage of the middle ring cable;
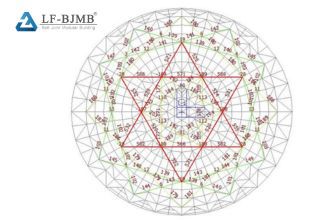
Figure 8: Schematic diagram of tensioning the second stage
Step 3: Tensioning the first stage of the outer ring cable;
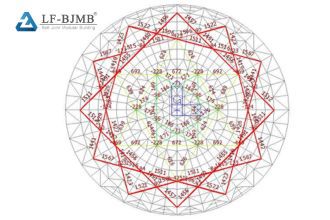
Figure 9: Schematic diagram of tensioning the third stage
Step 4: Tensioning the second stage of the outer ring cable;
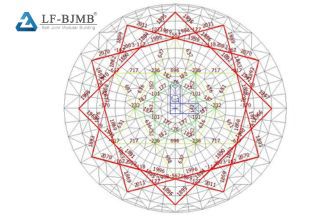
Figure 10: Schematic diagram of tensioning the fourth stage
Step 5: Tensioning the second stage of the middle ring cable;
Figure 11: Schematic diagram of tensioning the fifth stage
Step 6: Tensioning the second stage of the inner ring cable
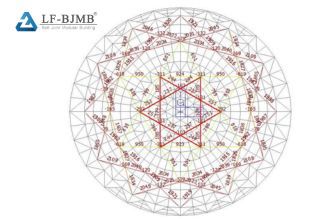
Figure 12: Schematic diagram of tensioning the sixth stage
4) Key Technologies for Cable Construction
Based on the positional relationship of the inner ring cable, middle ring cable, and outer ring cable, and the overall construction principle of smooth and orderly progress, the inner ring cable is laid and installed first, then the middle ring cable is laid and installed, and finally the outer ring cable is laid and installed. Assembly principle: Ensure that the cable numbering, cable clamp marking points, and the vertical position of the cables match the construction drawings.
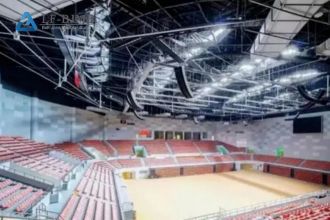
Figure 13 Cable position relationship diagram
Copyright © Xuzhou LF Engineering & Construction Co., Ltd. All Rights Reserved.


 +86 177 5198 6706
 +86-516-8595-0258


